Getting Started with Pivet on Windows
Pivet is an open source PeopleSoft versioning tool that allows for git-based version control for PeopleSoft definitions. I originally installed Pivet in one of my demo instances last year and have been making use of it to backup/document the PeopleCode for some of my open source projects. I recently deployed a new environment and wanted to get Pivet up and running in it. In this post I will document the steps that I took to get the latest version (0.2 at the time of writing) of Pivet installed and working in my Windows environment.
Download Pivet
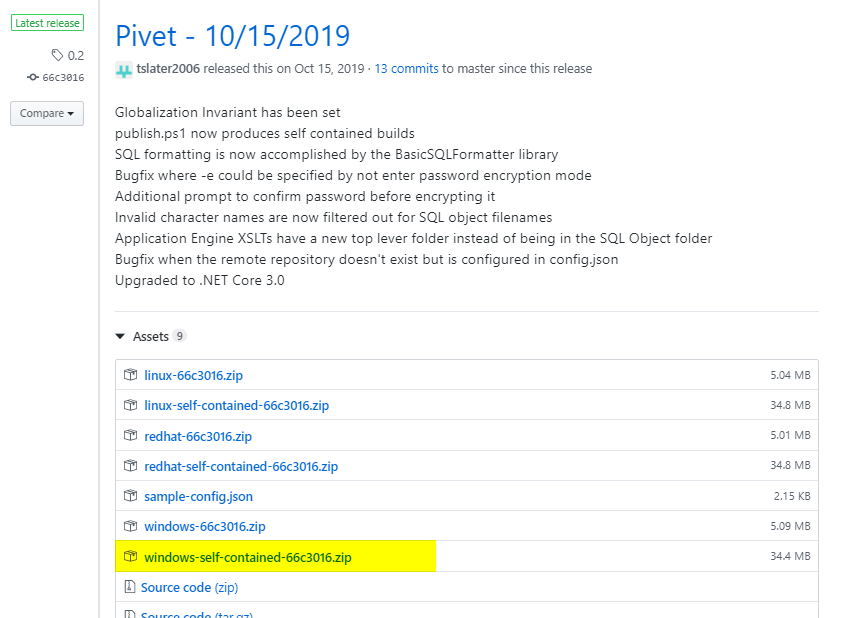
Navigate to the Releases tab of the Pivet GitHub repository and download the Windows self contained build zip file.
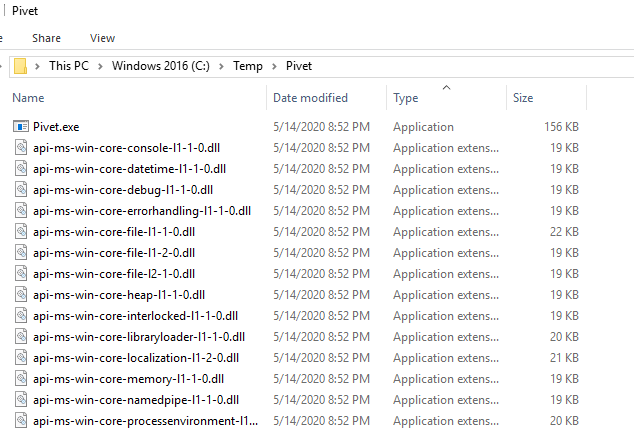
Extract the zip file into a local directory. In this example I extracted the Pivet files into C:\Temp\Pivet.
Create Config File
Pivet needs a config.json file defined in the directory where pivet.exe resides. This config file will define Environment and Profile information. Environments will contain the database connection details while Profiles will define which objects need to be processed and exported. Pivet allows for multiple Environments and Profiles to be defined.
Pivet is capable of generating the properly formatted config.json by running pivet.exe -b. This “config builder mode” is a guided process that will prompt you for the variable input that is needed to create an Environment and Profile.
Note
I came across an error when I first ran the pivet.exe -b command. See the Troubleshooting Tips for more details.
Here is the variable input that I provided to the program to create an Environment and Profile that is capable of backing up a single PeopleSoft project called PIVET_DEMO.
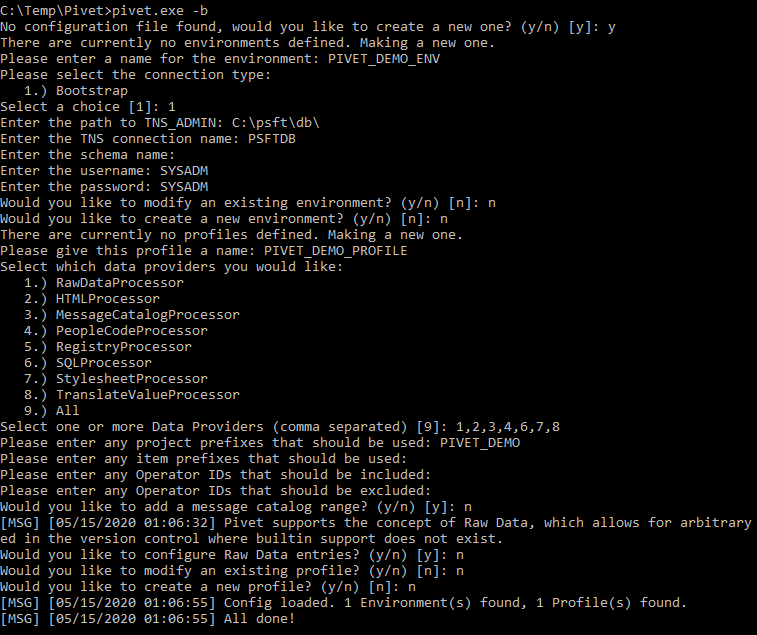
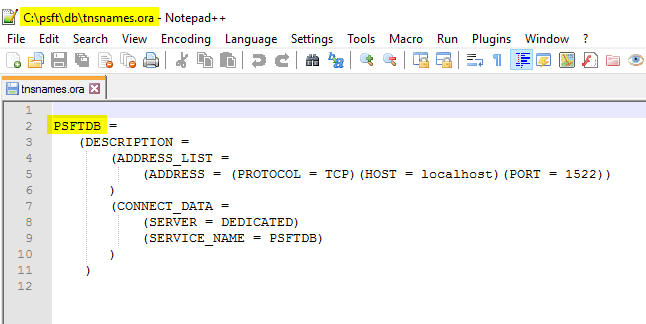
Most of the config values that the process asks for is self explanatory with a couple of exceptions. I was not sure what the Schema value refers to so I left it blank. The TNS_ADMIN value is simply the path the the tnsnames.ora file and the TNS value is the service name that contains the database connection details for the environment that you want to connect to.
This was the config.json file that the process generated for this example:
{
  "Environments": [
    {
      "Name": "PIVET_DEMO_ENV",
      "Connection": {
        "Provider": "Bootstrap",
        "TNS": "PSFTDB",
        "TNS_ADMIN": "C:\\psft\\db\\",
        "Schema": "",
        "BootstrapParameters": {
          "User": "SYSADM",
          "EncryptedPassword": "Q0qXSEOj"
        }
      }
    }
  ],
  "Profiles": [
    {
      "Name": "PIVET_DEMO_PROFILE",
      "DataProviders": [
        "RawDataProcessor",
        "HTMLProcessor",
        "MessageCatalogProcessor",
        "PeopleCodeProcessor",
        "SQLProcessor",
        "StylesheetProcessor",
        "TranslateValueProcessor"
      ],
      "Filters": {
        "Projects": [
          "PIVET_DEMO"
        ],
        "Prefixes": [],
        "IncludeOprids": [],
        "ExcludeOprids": [],
        "MessageCatalogs": [],
        "RawData": []
      }
    }
  ],
  "Jobs": []
}
The above config works well for an example, but it does not demonstrate the strength that Profiles have to offer. Check out the sample-config.json file in the GitHub repository to get an understanding of how to configure more complex Profiles.
Create a Job
Now that you have an example Environment and Profile configured, you will need to create a Job. A Job is specified in the config.json and it is what prompts Pivet to process a Profile when pivet.exe is ran. Pivet allows for multiple Jobs to be defined.
Here is an example Job config to export the objects from the PIVET_DEMO App Designer project to a local directory. Notice how you reference the Environment and Profile name that was created in the previous step.
{
  "Name": "PIVET_DEMO_JOB",
  "EnvironmentName": "PIVET_DEMO_ENV",
  "ProfileName": "PIVET_DEMO_PROFILE",
  "OutputFolder": "C:\\temp\\PIVET_DEMO\\src"
}
This object can be added to the Jobs array within the config.json file
{
  "Environments": [
    {
      "Name": "PIVET_DEMO_ENV",
      "Connection": {
        "Provider": "Bootstrap",
        "TNS": "PSFTDB",
        "TNS_ADMIN": "C:\\psft\\db\\",
        "Schema": "",
        "BootstrapParameters": {
          "User": "SYSADM",
          "EncryptedPassword": "Q0qXSEOj"
        }
      }
    }
  ],
  "Profiles": [
    {
      "Name": "PIVET_DEMO_PROFILE",
      "DataProviders": [
        "RawDataProcessor",
        "HTMLProcessor",
        "MessageCatalogProcessor",
        "PeopleCodeProcessor",
        "SQLProcessor",
        "StylesheetProcessor",
        "TranslateValueProcessor"
      ],
      "Filters": {
        "Projects": [
          "PIVET_DEMO"
        ],
        "Prefixes": [],
        "IncludeOprids": [],
        "ExcludeOprids": [],
        "MessageCatalogs": [],
        "RawData": []
      }
    }
  ],
  "Jobs": [
    {
      "Name": "PIVET_DEMO_JOB",
      "EnvironmentName": "PIVET_DEMO_ENV",
      "ProfileName": "PIVET_DEMO_PROFILE",
      "OutputFolder": "C:\\temp\\PIVET_DEMO\\src"
    }
  ]
}
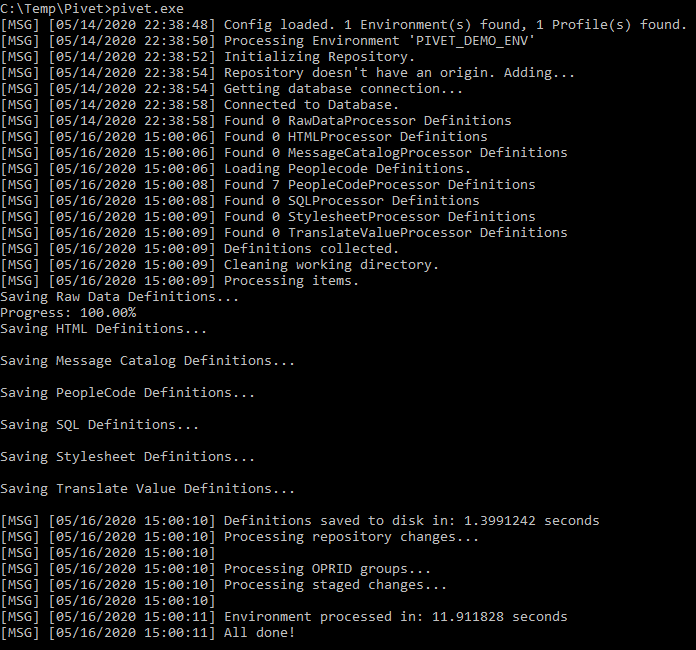
Now when pivet.exe is ran, the program picks up the Job config and processes the Profile. In this example the PIVET_DEMO App Designer project only contained PeopleCode object types and this is reflected in the program output.
The exported objects can be viewed in the OutputFolder folder defined in the Job config.
More on Jobs
The above Job was configured to only save the objects to a local directory and not a remote git repository. If you would like for the objects to be automatically pushed to a remote repository when running Pivet, then you will need to specify the Repository within the Job. I personally don’t make use this functionality, but you can check out the sample-config.json to see how to format the config. The biggest gotcha for this is to specify the git user password as an encrypted string. You will need to run pivet.exe -e to run the guided process to encrypt the git user password.
Note
The pivet.exe -e encryption process can also be used to encrypt the database password to be specified for the EncryptedPassword property in the Environment config. This can be helpful for if the database password ever changes for an Environment.
Troubleshooting Tips
I ran into a minor error when attempting to run pivet.exe for the first time. It is possible that this error was specific to the environment that I was working in.
Error:
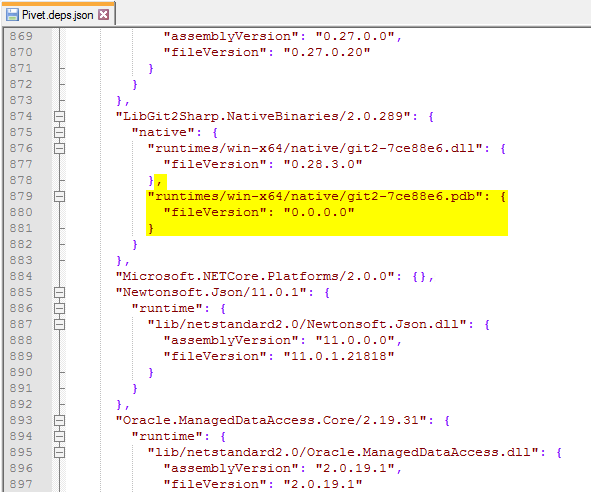
An assembly specified in the application dependencies manifest (Pivet.deps.json) was not found:
package: 'LibGit2Sharp.NativeBinaries', version: '2.0.289'
path: 'runtimes/win-x64/native/git2-7ce88e6.pdb'
Solution
I removed the runtimes/win-x64/native/git2-7ce88e6.pdb property on line 878 in the Pivet.deps.json file.